Replacing the heating element in your Whirlpool dryer can save you hundreds of dollars and restore your dryer’s ability to heat efficiently. This comprehensive guide will walk you through the process, providing detailed steps, helpful tips and essential safety precautions.
If your dryer is blowing cold air or taking too long to dry clothes, this guide will help you get your Whirlpool dryer back to peak performance.
A faulty heating element is one of the most common reasons a Whirlpool dryer stops heating. Instead of replacing the entire dryer, swapping out the heating element is often a cost-effective and eco-friendly solution.
This guide provides a clear, step-by-step approach to safely replacing the heating element in your Whirlpool dryer. Let’s dive in!
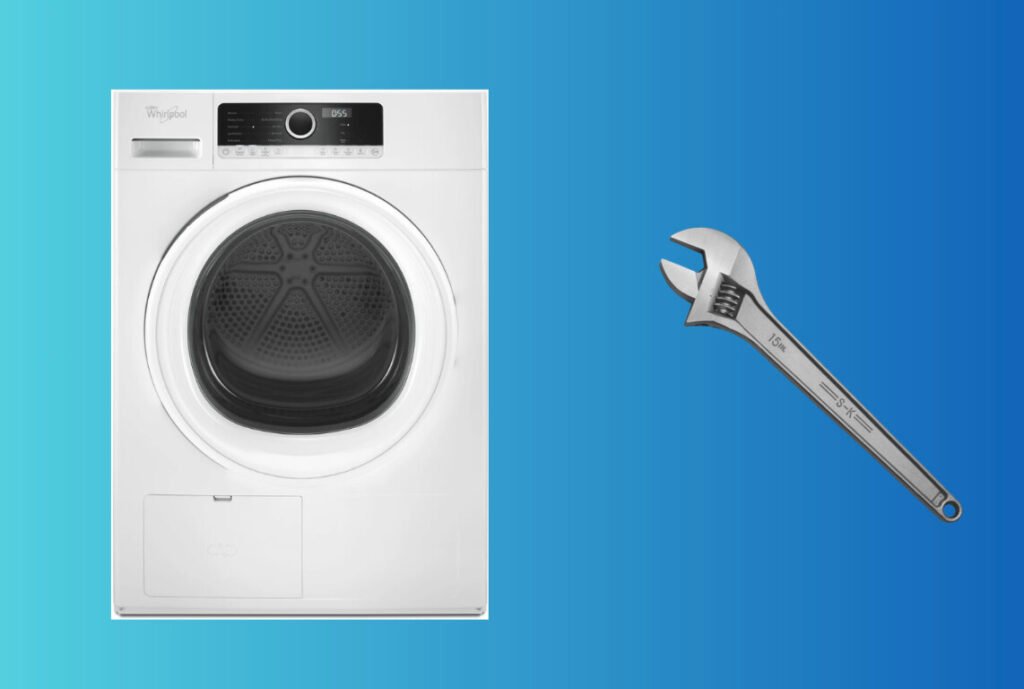
1. Gathering Your Tools and Materials
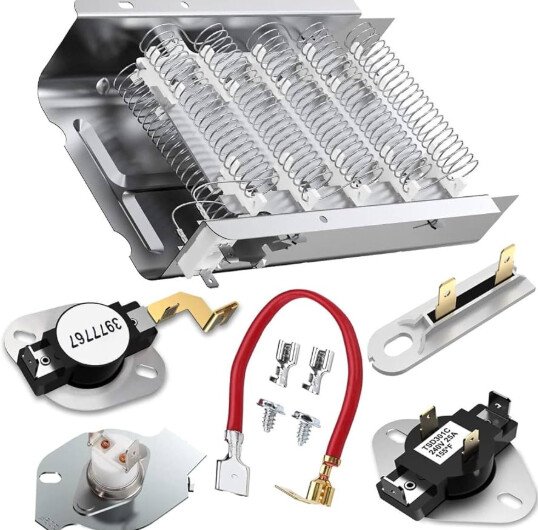
Whirlpool dryer heating element replacement and tools
Before you begin, make sure you have all the necessary tools and materials. Being prepared will make the repair faster and less stressful.
Tools/Materials:
- Replacement Heating Element: Buy a heating element that matches your Whirlpool dryer model number. You can find compatible parts at appliance repair stores or online.
- Screwdrivers: Phillips head and flathead screwdrivers in various sizes.
- Nut Driver or Socket Set: Common sizes include 1/4-inch and 5/16-inch.
- Multimeter (Optional): Helpful for testing the heating element and confirming continuity.
- Pliers: For gripping connectors and wires.
- Work Gloves: To protect your hands from sharp metal edges.
- Vacuum or Brush: To clean lint and debris while the dryer is open.
2. Safety First: Unplug and Prepare
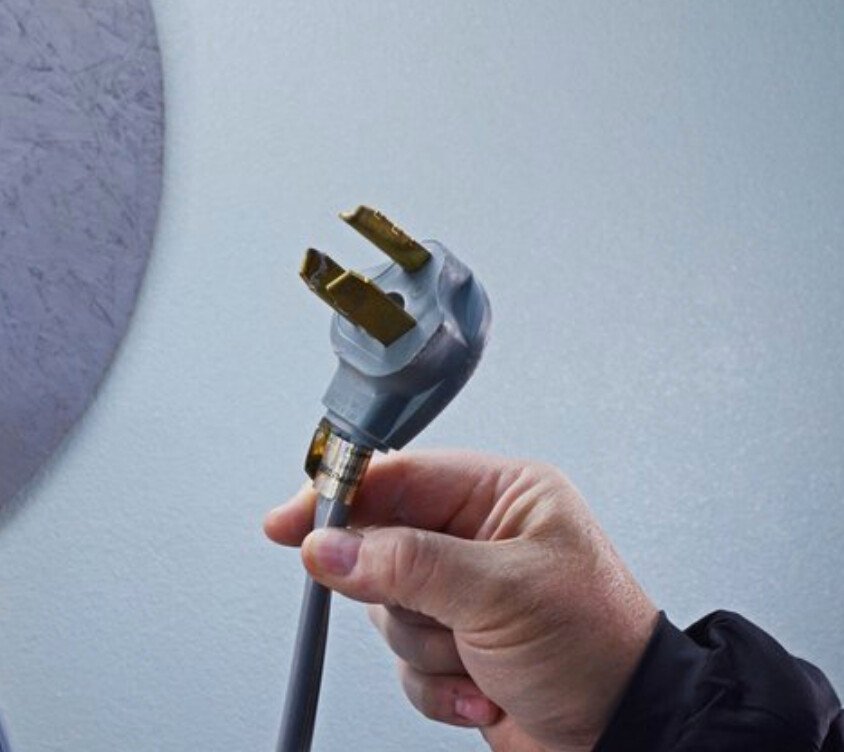
Safety is critical when working on any appliance. Dryers use high voltage, so take the proper precautions.
- Unplug the Dryer: Always disconnect the dryer from the power outlet before starting any repair.
- Disconnect the Vent Hose: This makes it easier to move the dryer and access internal components.
- Prepare Your Workspace: Work in a well-lit area with enough space to move around the dryer.
- Review the Manual: Check your Whirlpool dryer’s user manual for model-specific instructions or warnings.
3. Opening the Dryer Casing
To access the heating element, you’ll need to open the dryer cabinet. The exact steps vary slightly by model, but the general process is similar.
- Locate the Screws: Remove screws from the back panel or front panel, depending on your Whirlpool model.
- Keep Track of Screws: Place screws in a small container so you don’t lose them.
- Remove the Panel: Carefully lift off the back or front panel to expose the dryer’s internal components.
- Find the Heating Element Housing: The heating element is typically located inside a metal housing near the blower or rear of the dryer.
4. Disconnecting the Old Heating Element
Once you’ve located the heating element, you can remove the faulty part.
- Take a Photo: Before disconnecting wires, take a picture so you can reconnect everything correctly later.
- Disconnect the Wires: Use pliers to gently pull off the wire connectors from the heating element terminals.
- Remove the Housing Screws: Use a nut driver or screwdriver to remove the screws securing the heating element housing.
- Slide Out the Heating Element: Carefully pull the heating element assembly out of the housing.
5. Installing the New Heating Element
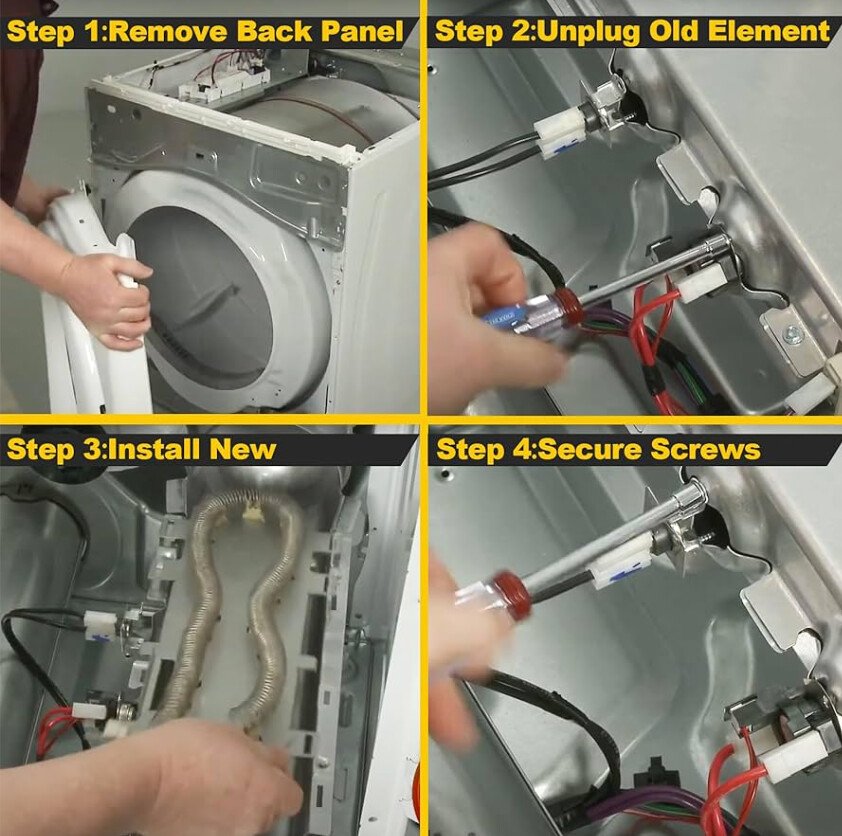
Now it’s time to install the replacement heating element.
- Insert the New Element: Slide the new heating element into the housing, making sure it fits securely.
- Reattach the Housing: Secure the housing back in place with screws.
- Reconnect the Wires: Attach the wires to the correct terminals using your reference photo. Make sure the connections are snug.
- Check for Loose Wires: Ensure no wires are touching metal surfaces or moving parts.
6. Reassembling the Dryer
With the new heating element installed, you can reassemble the dryer.
- Replace the Panel: Align the back or front panel and secure it with screws.
- Reconnect the Vent Hose: Attach the dryer vent hose and tighten the clamp.
- Plug in the Dryer: Reconnect the power cord to the outlet.
7. Final Checks and Testing
After reassembly, perform a few checks to ensure everything is working properly.
- Run a Test Cycle: Turn the dryer on and select a heat cycle.
- Check for Warm Air: After a few minutes, verify that the dryer is producing heat.
- Listen for Unusual Noises: Strange sounds may indicate a loose part or misaligned panel.
- Monitor Performance: Make sure clothes are drying faster than before and the dryer is operating normally.
FAQ Section
How do I know if my Whirlpool dryer heating element is bad?
Common signs include the dryer running but not heating, clothes taking too long to dry, or a burning smell. You can also test the element with a multimeter for continuity.
Can I use any heating element as a replacement?
No, you should always use a heating element that matches your Whirlpool dryer’s model number. Using the wrong part can cause damage or safety issues.
What if my dryer still doesn’t heat after replacing the heating element?
Check the thermal fuse, thermostat, and wiring. These components can also cause heating issues. If the problem persists, consider contacting a professional technician.
Is it safe to replace the heating element myself?
Yes, as long as you unplug the dryer and follow safety precautions. Take your time and avoid touching sharp metal edges.
Where can I buy a replacement Whirlpool dryer heating element?
You can purchase replacement parts from appliance repair shops, Whirlpool’s official website, or online marketplaces like Amazon.
What should I do with the old heating element?
Dispose of the old heating element according to local electronic waste guidelines. Many recycling centers accept appliance components.
Tips & Warnings On How To Replace A Whirlpool Dryer Heating Element
- Always Unplug the Dryer: Never work on a plugged-in appliance.
- Use the Correct Part: Match the heating element to your dryer’s model number.
- Take Photos: Document wire connections before disconnecting them.
- Clean Lint Build-Up: While the dryer is open, remove lint to improve airflow and reduce fire risk.
- Avoid Over-Tightening Screws: Tighten screws securely but don’t strip the threads.
- Test Thoroughly: Run multiple cycles to confirm the dryer heats consistently.
Conclusion
Replacing the heating element in your Whirlpool dryer is a practical DIY repair that can save you money and extend the life of your appliance. By following this step-by-step guide, you can safely diagnose and replace a Whirlpool dryer heating element to restore your dryer’s heating performance.
Prioritize safety, use the correct replacement parts and take your time during the process. With a bit of patience, you’ll have your Whirlpool dryer running efficiently again in no time.
If you ever encounter issues, revisit this guide or consult a professional technician for additional help. Happy repairing!